
Add Custom Domain as an alias in Gmail for Free
It is important for a brand to look professional and a custom email is a big part of it. We can get one for free using this trick via Gmail itself.

Updated 3 July 2026: Google removed the "Less Secure Apps" setting back in 2022, so the old first step no longer exists. You now just need 2-Step Verification and an App Password, and the guide below has been updated to match.
You just started a website or blog and you're still emailing people from yourbrand@gmail.com. If paying for Google Workspace only to get a custom address feels like overkill, here's the good news: you can do it for free, right inside the Gmail you already use.
Lets Begin
Before anything else, make sure you can already receive mail at your domain address, either through a real mailbox or forwarding, because Gmail sends a verification code there near the end. If you haven't set that up yet, my Cloudflare Email Routing guide gets you free forwarding in a few minutes.
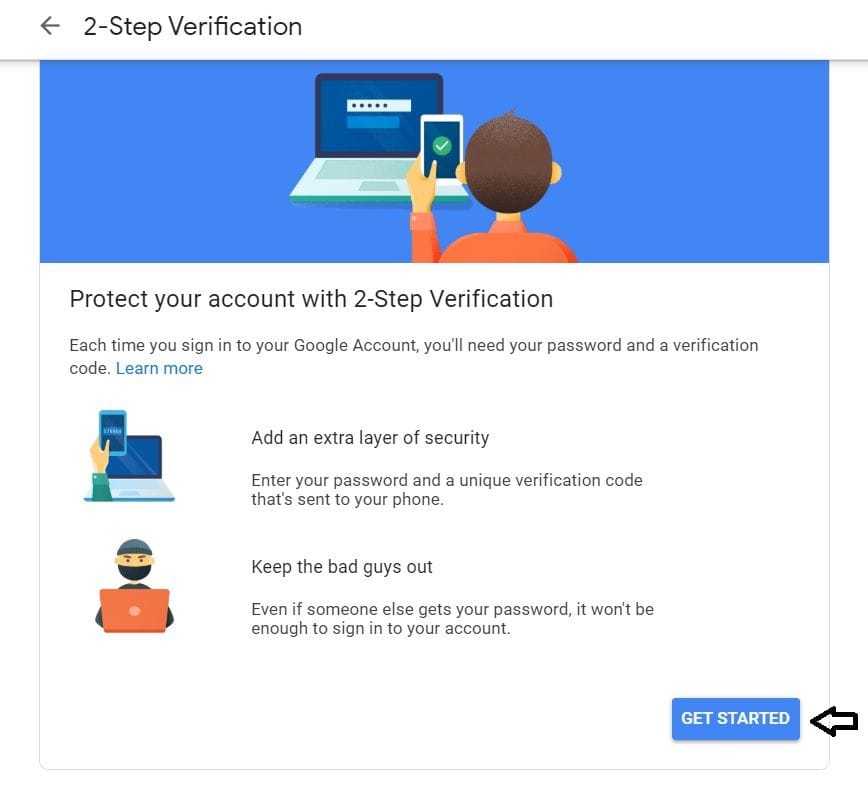
Turn on 2-Step Verification
Open your Google account security settings and switch on 2-Step Verification. Google only lets you create App Passwords once this is on, and it's worth doing for your account's safety anyway. While you're there, add a couple of recovery options so you never get locked out.
Create an App Password
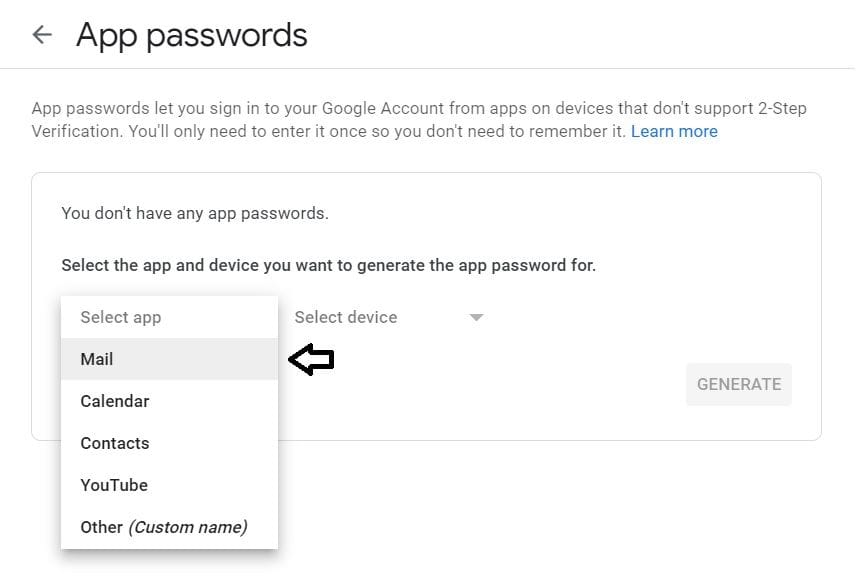
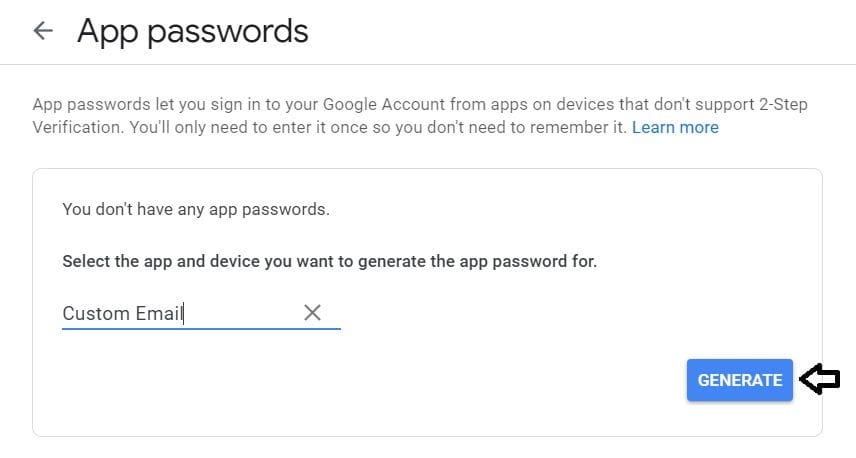
With 2-Step Verification on, the App Passwords option appears in your security settings. Create a new one, choose "Mail" as the app and "Other" as the device, and give it a name you'll recognize like "Gmail send-as".
Then click "Generate".
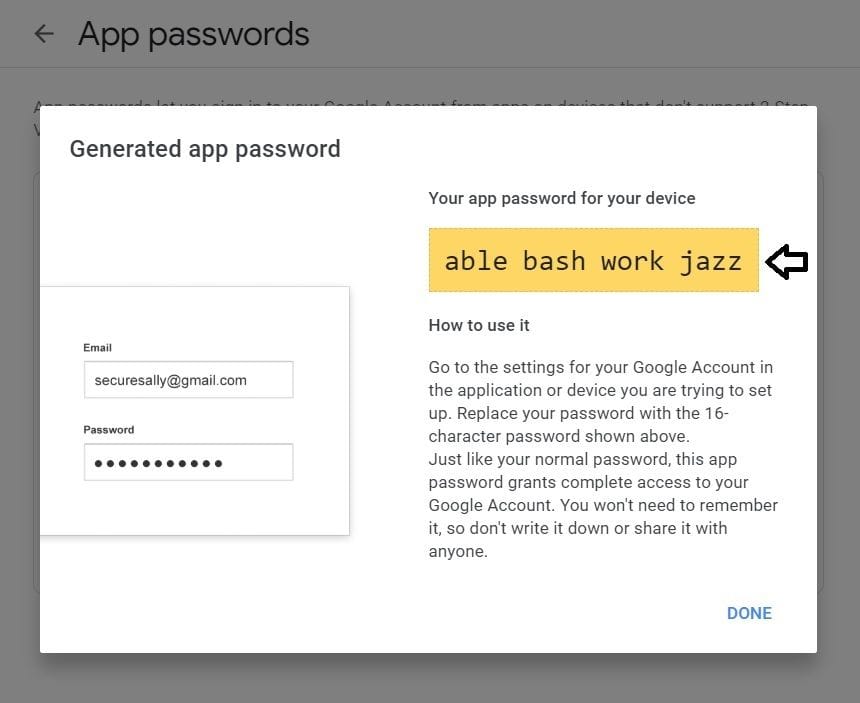
Copy the 16-character password it shows you and store it somewhere safe. Google only shows it once, so if you lose it you just generate a new one.
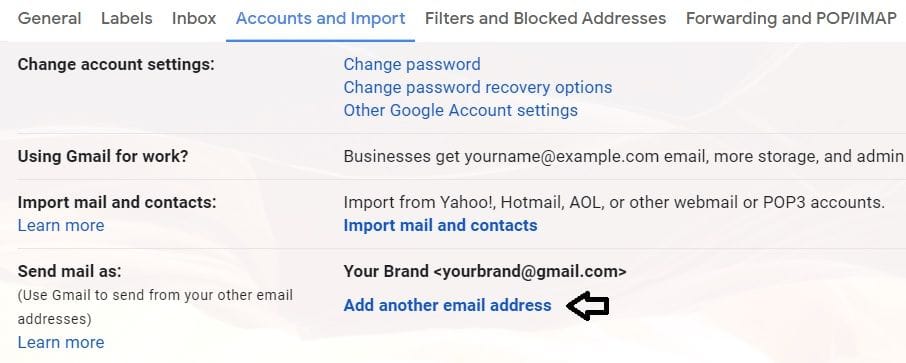
Add the address to Gmail
In Gmail, open Settings and go to the "Accounts and Import" section. Under "Send mail as", click "Add another email address".
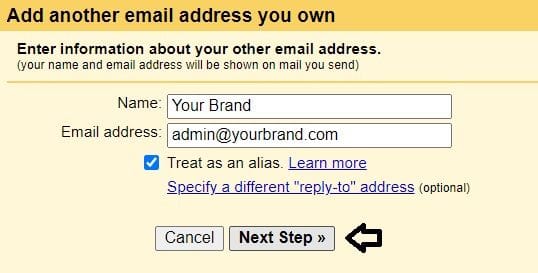
Enter your name and your custom address, like admin@yourbrand.com.
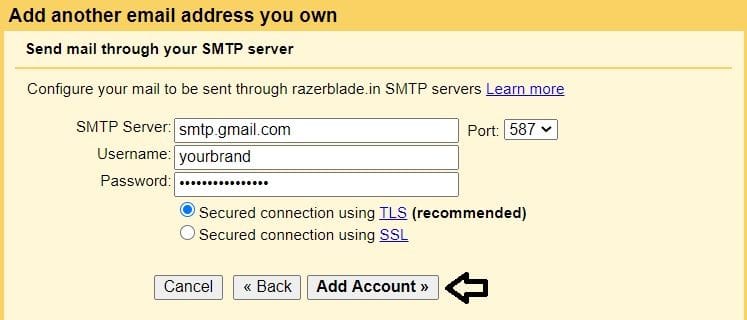
On the next screen, use these SMTP settings:
SMTP Server: smtp.gmail.com
Port: 587
Username: your full Gmail address (yourbrand@gmail.com)
Password: the app password you just generated
Then click "Add Account".
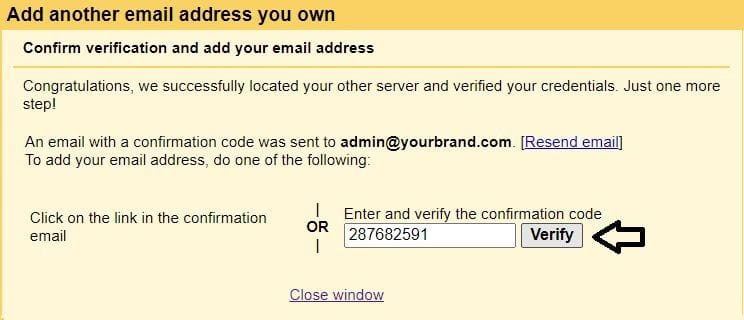
Gmail sends a verification code to your custom address. Grab it, type it in, and click "Verify".
That's it. You can now send from your branded address without ever leaving your Gmail inbox.
Hope this helped. Hit me up if you have any questions.