
Install Ghost on Linode as a Second Website
Ghost is a one of the best alternatives to Wordpress for blogging and super easy to host alongside your main website on Linode with the setup taking just a few minutes.

Updated 3 July 2026: refreshed for Ghost 6, Node 22, Ubuntu 24.04, and MySQL 8. Linode is now part of Akamai Cloud, but the dashboard and the cheap Nanode plan still work the same way. I also fixed an old mistake in here: Ghost runs on Node, not PHP, so there was never really a "P" in this stack.
Ghost is a lovely blogging platform built on Node.js, and for a simple blog or a mostly static site I'll take it over WordPress any day. It's fast, it's clean, and it stays out of your way.

For this setup I'm running Nginx, MySQL, and Node.js on Ubuntu 24.04 LTS on the cheapest Nanode plan at Linode (now Akamai Cloud). Ghost is light enough that you can run it next to your other sites on the same box using Nginx server blocks, which are Nginx's take on Apache's virtual hosts. 1 GB of RAM is the documented minimum, though 2 GB is more comfortable once you add other sites.
Lets Begin
- Create a non-root user if you don't already have one. Ghost-CLI refuses to install as root, so this part isn't optional. I'm making a user called "priyansh" and adding it to the sudo group.
adduser priyansh
usermod -aG sudo priyansh
2. Update the system and install build-essential:
sudo apt update && sudo apt upgrade
sudo apt install build-essential
3. Install MySQL 8, which Ghost uses for its database, then run the security prompts to set a root password:
sudo apt install mysql-server
sudo mysql_secure_installation
4. Install Node.js. Ghost 6 runs on Node 22 LTS, so pull it from NodeSource. Then install Ghost-CLI, which does the heavy lifting for the actual install.
curl -sL https://deb.nodesource.com/setup_22.x | sudo -E bash -
sudo apt install nodejs
sudo npm install -g ghost-cli@latest
Install Ghost
I'll install into /var/www/priyan.sh, since this is just one of several sites on the server. Create the directory, hand it to the "priyansh" user, and set the permissions Ghost expects.
sudo mkdir -p /var/www/priyan.sh
sudo chown priyansh:priyansh /var/www/priyan.sh
sudo chmod 775 /var/www/priyan.sh
Move into it and confirm it's empty:
cd /var/www/priyan.sh
ls -a
Now run the install. Ghost-CLI asks you a handful of questions; the Ghost documentation explains each one.
ghost install- Blog URL - https://priyan.sh
- MySQL hostname - localhost
- MySQL username - root (or a dedicated user you created)
- MySQL password - your MySQL password
- Ghost database name - ghost
- Set up "ghost" MySQL user - Yes
- Nginx setup - Yes
- SSL setup - Yes
- Systemd setup - Yes
- Start Ghost - Yes
Nginx should configure itself automatically. If something goes sideways, here's a working server block to fall back on. You'll find the config at "/etc/nginx/sites-available", with separate files for HTTP and HTTPS to edit accordingly.
server {
    listen 80;
    listen [::]:80;

    server_name priyan.sh www.priyan.sh;
    root /var/www/priyan.sh;

    location / {
        proxy_set_header X-Forwarded-For $proxy_add_x_forwarded_for;
        proxy_set_header X-Forwarded-Proto $scheme;
        proxy_set_header X-Real-IP $remote_addr;
        proxy_set_header Host $http_host;
        proxy_pass http://127.0.0.1:2368;

    }

    location ~ /.well-known {
        allow all;
    }

    client_max_body_size 50m;
}
Ghost listens on port 2368 by default. If this is your second Ghost site on the same server, give it its own port in the Ghost config and match that number in the proxy_pass line above.
After editing, delete the old symlinks in "/etc/nginx/sites-enabled", create fresh ones, and restart Nginx.
sudo rm /etc/nginx/sites-enabled/priyan.sh.conf
sudo rm /etc/nginx/sites-enabled/priyan.sh-ssl.conf
sudo ln -s /etc/nginx/sites-available/priyan.sh.conf /etc/nginx/sites-enabled/priyan.sh.conf
sudo ln -s /etc/nginx/sites-available/priyan.sh-ssl.conf /etc/nginx/sites-enabled/priyan.sh-ssl.conf
sudo systemctl restart nginx
That sets up Nginx for your Ghost blog. I'd also restart Ghost after any config change to avoid stale errors.
cd /var/www/priyan.sh
ghost restart
Final Setup
Head to your admin area by adding "/ghost" to your site address. You'll land on the welcome screen.

Enter your email, name, password, and site title to create the admin user:
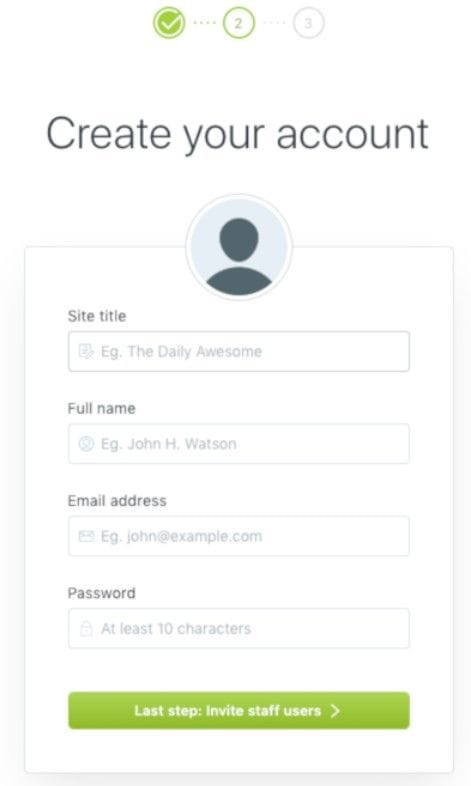
Poke around the admin area and get a feel for it. Your blog is ready.
Troubleshooting
From the install directory "/var/www/priyan.sh", as the non-root "priyansh" user, Ghost-CLI can diagnose most problems for you:
ghost doctorIf you're still stuck, the Ghost community forum is genuinely helpful, or drop me a comment.